With all the posts about Annie Sloan Chalk Paint going around blog land I knew that eventually I would get around to giving it a try.

I held out until I could buy it close enough to me to not have to pay shipping, plus I just wanted to see it in person before I put out the $$ for it. So, weekend before last I found
The Restored Home in an antique mall in Alvin and asked the hubby if we could drive over. (my 'Houston' driving is limited to right here around the house, which for the most part is just fine) I lucked out that Rhonda happened to be there when we stopped in so it was nice to actually talk to her. She has some really beautiful pieces in her booth. (she also has a
blog where she shares tips)
So, I had my paint and my wax, I just needed to pick my first victim(s).

I decided I would paint the bar stools

and this plant stand.
One of the things that really caught my attention is that you don't have to sand before you paint and yes, it does work. The three pieces I started with were all dark and it took me three coats to get decent coverage. I've seen people say they don't have brush marks but I will have to say I had lots of brush marks. That said, it is super easy to sand to a smooth finish, and the paint dries really fast so you don't have to wait long to paint another coat or to sand. I don't know how to explain the 'it sticks but it is easy to sand/distress' part, I just know it works!
At the last minute I decided I would take my projects outside to sand them. Good decision.

As you can see, the sanding makes a huge mess! (think banging erasers together at school, if you are old enough that there were actually chalk boards in the classroom!) I did read later that you could wax before sanding so I tried that with the next project (which is almost done!) but I couldn't tell it was really any less messy. :( I was really hoping to use the chalk paint on a big project that I didn't want to have to take out side and was (still am) considering it for my kitchen cabinets, but the sanding dust might be an issue. Time will tell.
Anywho - here is what my projects look like painted, sanded and waxed.

The plant stand is right as you come in the front door.

And the bar stools are at the breakfast bar. Okay - only one in this picture because if I back up far enough to take a picture of both, you see the bar too - that might be my 'reality Thursday' pic.

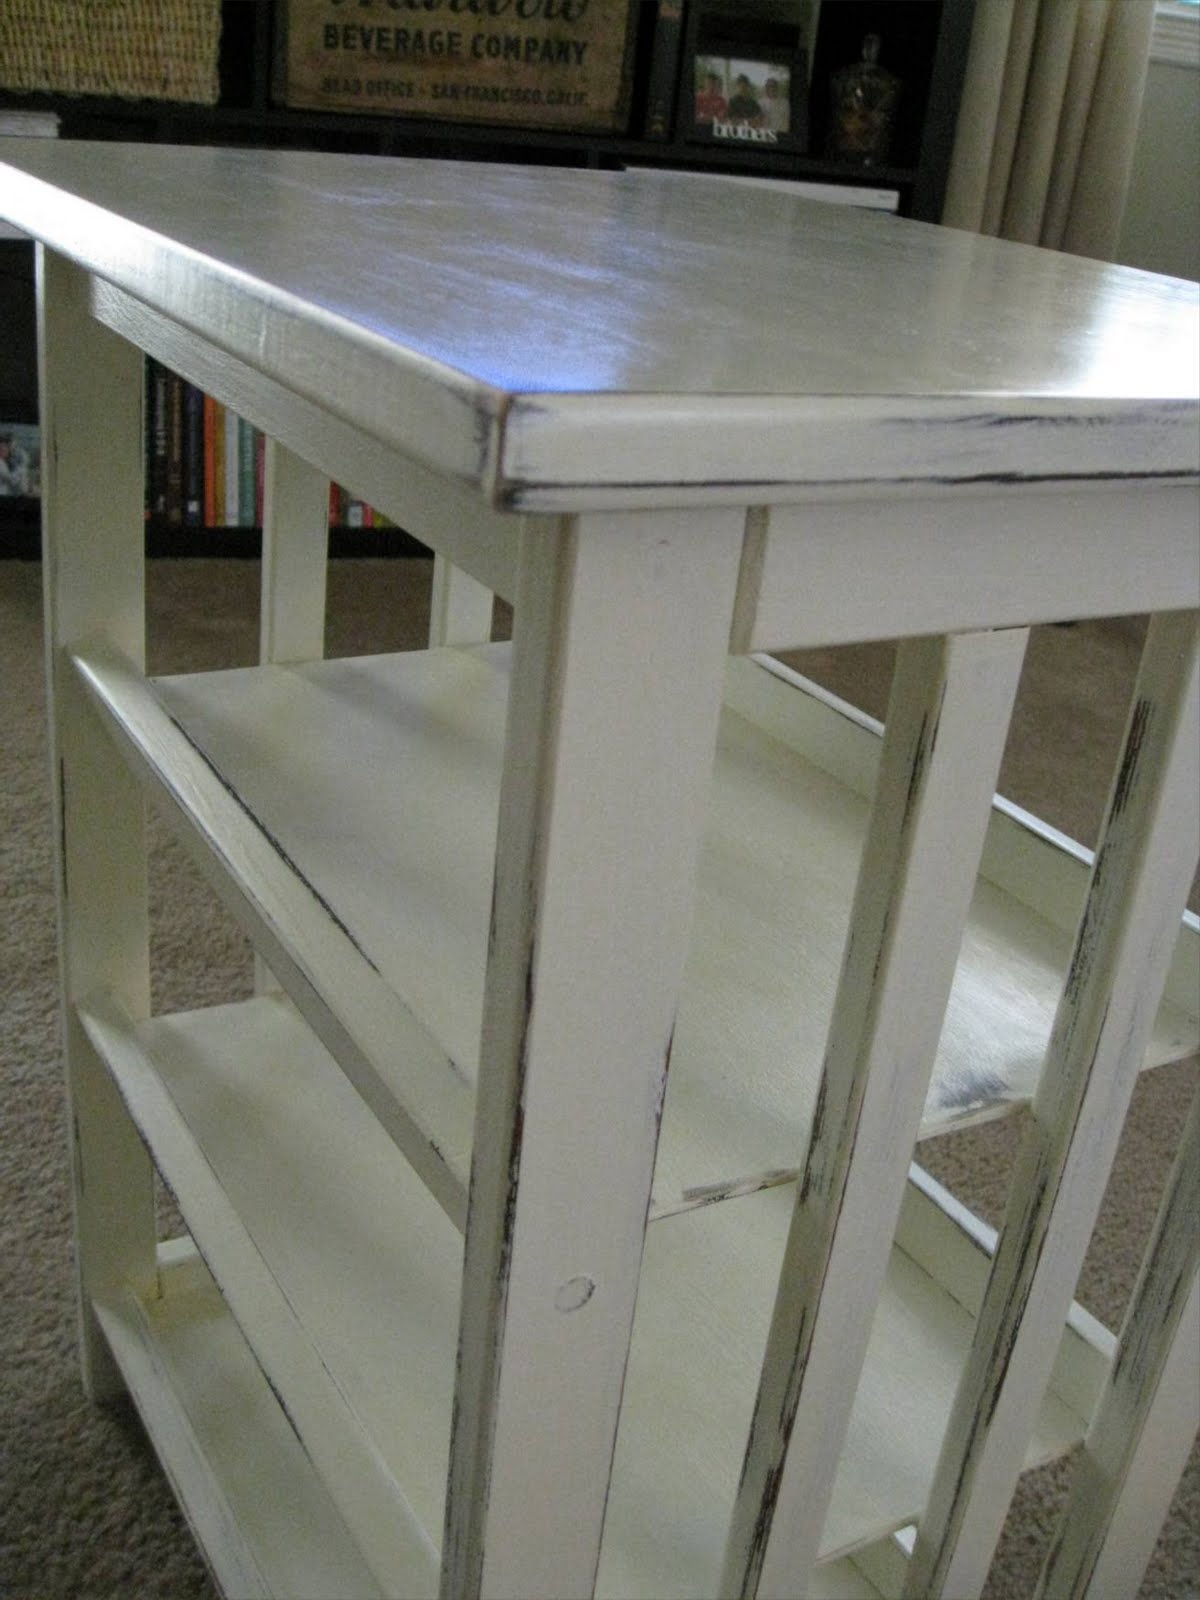
Close-up of the distressing on the bar stool. You can't really see in the pic, but the seat is extremely smooth!
I have another project almost finished and I still have about half the quart of paint and well over half the wax. Next I want to try layering different colors but that means a trip back to
The Restored Home.So, just like most things, there are pros and cons to the chalk paint. I love the finish and will absolutely use it again (I only have another half-dozen, more or less, projects in mind) but I'm sure I'll also use latex paint too. It all depends on the project and the look you are going for.
I was hoping to be finished with the trunk but we had to make an unexpected trip out of town yesterday so I've still got a coat of poly to finish up and then will give it time to dry before we bring it in. (I'll have to have the hubby's help with that since it is coming upstairs!)